Step By Step Installation of Oracle 19c RAC on Oracle Linux 7 Using VirtualBox
In this article we will be setting-up Oracle database 19c RAC on VirtualBox using Oracle Linux OEL 7.3
Assumption
=> Role Separation: Oracle Database Binary will be owned by "oracle" & Cluster Binary will be owned by "grid" user.
=> DNS Server Setup: I have already setup DNS server. For details please click DNS_SETUP
=> NTP Server Setup: NTP server also created .For more details please click NTP_SETUP
=> RAM per Node: Atleast 10GB of RAM is required per node to function RAC system properly.
=> IP range Setup: Public IP range & Private IP range would be as below.

=> Oracle Virtual Box Setup: I have installed Oracle Virtual Box on Ubuntu .For Setup please click . VM_Installation_On_Ubuntu
=> Shared Disks: We will use DATA,FRA & OCR with external redundancy
Required Software
Please download below software from mentioned link.
=> Oracle Linux 7.3
=> Oracle Database 19c Release 3 – Linux x86-64
=> Oracle Grid 19c Release 3 – Linux x86-64
Part 1 => Oracle Virtual Box Setup
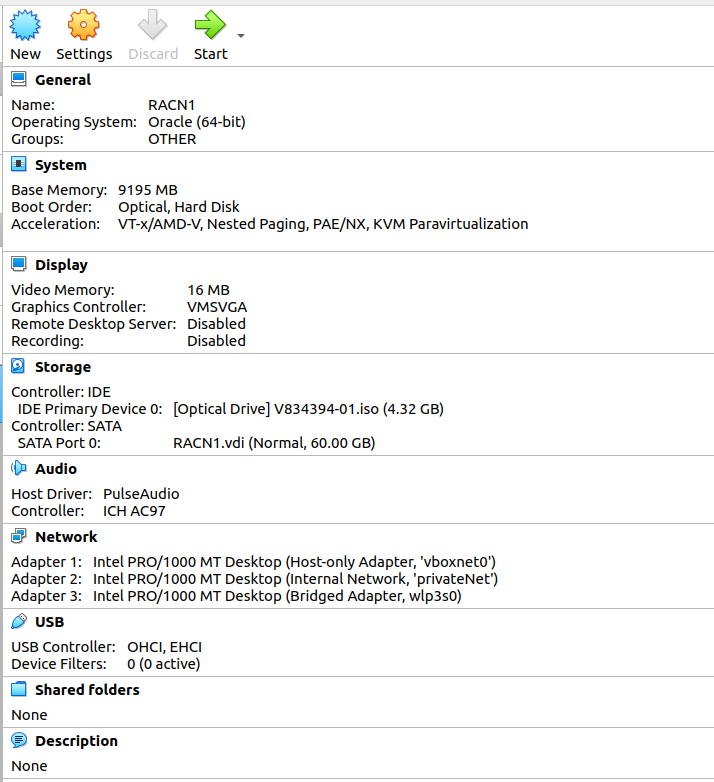
Open Virtual Machin and Click on Machine then new and then Next Name as below RACN1 and opt Oracle(64-Bit)Allocate 10GB approx
Click => Create a virtual disk => Click Create
Click => VDI disk => Click Next
Click => Fixed Size => Next
Set disk size 60GB and provide path for disk as below. Click => Create
Post Disk creation => Click Settings => Select "Bidirectional" as below
Move Floppy to last and Uncheck the same
Click Storage => Controller:IDE => Attach Hard disk => ISO file
Click Network => Adapter 1 => select as below option ( This is Public IP)
Click Network => Adapter 2 =>select as below option => Name it as below => ( This is Private IP)
Click Network => Adapter 3 =>select as below option => Name it as below => ( This is for Internet access)
Below will be final setting.Ensure before starting setup
Step 2 => OS installation
In this step we will installing Oracle Linux on above created VBox
Click on VBox and start the same. Select ISO file to start InstallationPress Enter
Select English as Below and Continue
below screen appears . Consider this as MAIN SCREEN
check proper Region and city and press Done
Click Software Selection from Main Screen and select below packages Base Environment => Server with GUI Add-ons as below Hardware Monitoring Utilities KDE Large Systems Performance Network file system client Performance Tools Compatibility Libraries Development Tools
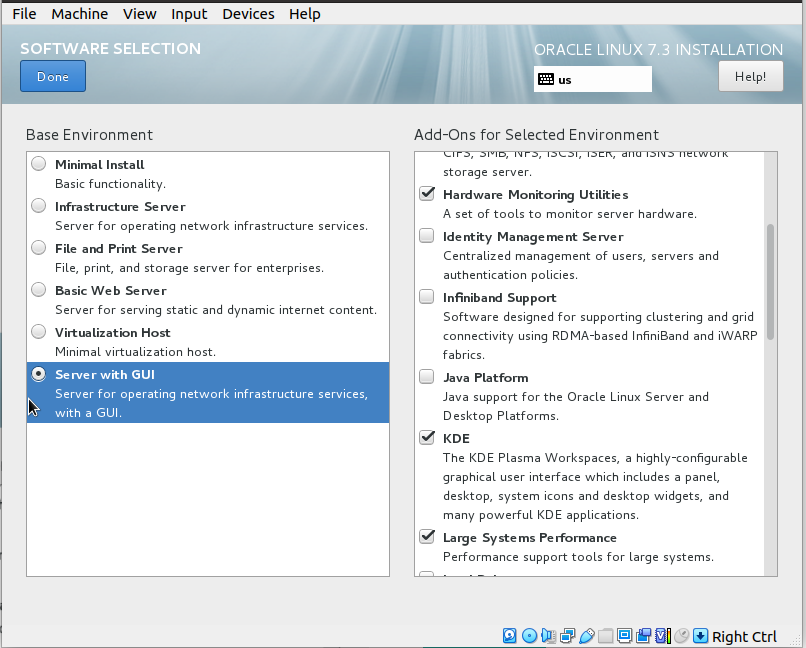
Click DONE
Click Installation Destination from Main Screen and Select 60GB Disk Click => i will configure partitioning =>Click Done
Click "+" Button as below
Enter "/boot" and size 2GB and Click => Add mount point
Click "+" Button & Enter "swap" and size 25GB and Click => Add mount point
Click "+" Button & Enter "/tmp" and size 20GB and Click => Add mount point
Click "+" Button & Enter "/" and size 15GB and Click => Add mount point
Final screen as below .Click => Done
Click => Accept Changes
Click Configure Network from Main Scren and Click enpOs3 (Used for Pub IP) Enter Hostname as below and click => Apply
Click => Configure => IPv4 Settings and provide below details for Pub IP Click => Save
Click => enpOs8 (Used for Private IP)
Click => Configure => IPv4 Settings and provide below details for Pub IP Click => Save
Click => enpOs9 (Used for Internet Connection) Click => Configure
Click => IPv4 Settings and leave it Default as below Click => Save
Verify all IP as below and Click => Done
Click => Begin Installation
Click => Root Password
Provide root password
Click => User Creation and Create user as below
Wait for Setup
Click Reboot
Click => License
Click => Accept
Click => FINISH
Now we will install Guest CD for pointer and shared folder easiness Click Device from VM Box top Corner => Insert Guest Addtions
Click => Run
Wait for installation to complete

Step 3=> Mount point for Binary installation
we will create 2 Mount points to store oracle & cluster binary. Click Settings => Controller:Sata => Add Hard diskClick on Create
Click =>VDI => Next
Click => Fixed Size => Next
Provide path for disks and set size as 20GB Click => Create
Perform same operation fo another disks of 20GB as below. Final output as below
Now we will Partition above added disks at OS level. Start VirtualBox Login as root and execute lsblk command as below. here disk sdb & sdc identified [root@racnoden1 ~]# lsblk NAME MAJ:MIN RM SIZE RO TYPE MOUNTPOINT sda 8:0 0 60G 0 disk ├─sda1 8:1 0 1.9G 0 part /boot ├─sda2 8:2 0 23.3G 0 part [SWAP] ├─sda3 8:3 0 18.6G 0 part /tmp ├─sda4 8:4 0 1K 0 part └─sda5 8:5 0 14G 0 part / sdb 8:16 0 20G 0 disk sdc 8:32 0 20G 0 disk sr0 11:0 1 58.7M 0 rom /run/media/oracle/VBox_GAs_6.1.34 [root@racnoden1 ~]# => Let we partition disk as below from ROOT user . Perform same operation for /dev/sdc disks. [root@racnoden1 ~]# fdisk /dev/sdb Welcome to fdisk (util-linux 2.23.2). Changes will remain in memory only, until you decide to write them. Be careful before using the write command. Device does not contain a recognized partition table Building a new DOS disklabel with disk identifier 0xc58a9811. Command (m for help): n Partition type: p primary (0 primary, 0 extended, 4 free) e extended Select (default p): p Partition number (1-4, default 1): First sector (2048-41943039, default 2048): Using default value 2048 Last sector, +sectors or +size{K,M,G} (2048-41943039, default 41943039): Using default value 41943039 Partition 1 of type Linux and of size 20 GiB is set Command (m for help): w The partition table has been altered! Calling ioctl() to re-read partition table. Syncing disks. [root@racnoden1 ~]# => Make ext3 type File System for above created partitions as below. [root@racnoden1 ~]# mkfs.ext3 /dev/sdb1 mke2fs 1.42.9 (28-Dec-2013) Filesystem label= OS type: Linux Block size=4096 (log=2) Fragment size=4096 (log=2) Stride=0 blocks, Stripe width=0 blocks 1310720 inodes, 5242624 blocks 262131 blocks (5.00%) reserved for the super user First data block=0 Maximum filesystem blocks=4294967296 160 block groups 32768 blocks per group, 32768 fragments per group 8192 inodes per group Superblock backups stored on blocks: 32768, 98304, 163840, 229376, 294912, 819200, 884736, 1605632, 2654208, 4096000 Allocating group tables: done Writing inode tables: done Creating journal (32768 blocks): done Writing superblocks and filesystem accounting information: done [root@racnoden1 ~]# [root@racnoden1 ~]# [root@racnoden1 ~]# mkfs.ext3 /dev/sdc1 mke2fs 1.42.9 (28-Dec-2013) Filesystem label= OS type: Linux Block size=4096 (log=2) Fragment size=4096 (log=2) Stride=0 blocks, Stripe width=0 blocks 1310720 inodes, 5242624 blocks 262131 blocks (5.00%) reserved for the super user First data block=0 Maximum filesystem blocks=4294967296 160 block groups 32768 blocks per group, 32768 fragments per group 8192 inodes per group Superblock backups stored on blocks: 32768, 98304, 163840, 229376, 294912, 819200, 884736, 1605632, 2654208, 4096000 Allocating group tables: done Writing inode tables: done Creating journal (32768 blocks): done Writing superblocks and filesystem accounting information: done => Mount disks and change permission as below. [root@racnoden1 ~]# mkdir /ora_home [root@racnoden1 ~]# mkdir /grid_home [root@racnoden1 ~]# mount /dev/sdb1 /ora_home/ [root@racnoden1 ~]# mount /dev/sdc1 /grid_home/ [root@racnoden1 ~]# chown oracle:oinstall /ora_home/ [root@racnoden1 ~]# chown grid:oinstall /grid_home/ [root@racnoden1 ~]# => Add entry in /etc/fstab for permanent permission as below from ROOT . [oracle@racnoden1 ora_home]$ cat /etc/fstab # # /etc/fstab # Created by anaconda on Fri Jun 10 15:54:13 2022 # # Accessible filesystems, by reference, are maintained under '/dev/disk' # See man pages fstab(5), findfs(8), mount(8) and/or blkid(8) for more info # UUID=74e70a63-25cb-4b57-b455-b58a6c0bf0a7 / xfs defaults 0 0 UUID=7bab256e-f0a1-48d5-8d7c-680a4718662b /boot xfs defaults 0 0 UUID=bdb9a1d4-e6fa-4cc4-b9d4-dc27a7a76246 /tmp xfs defaults 0 0 UUID=4261611d-b832-4ab8-96cc-8f3a06ff9705 swap swap defaults 0 0 /dev/sdb1 /ora_home ext3 defaults 1 2 /dev/sdc1 /grid_home ext3 defaults 1 2 [oracle@racnoden1 ora_home]$
Step 4=> Clone Virtual Box
Now we will be creating Clone for existing VirtualBox and will use this clone for creating Node-2 Click File on VirtualBox => Export ApplianceSet File location & value as below Click => Next
Click => Export
Wait for export to complete
Now we will import above created backup file Click File on VirtualBox => Import appliance => Select backup file => Click Next
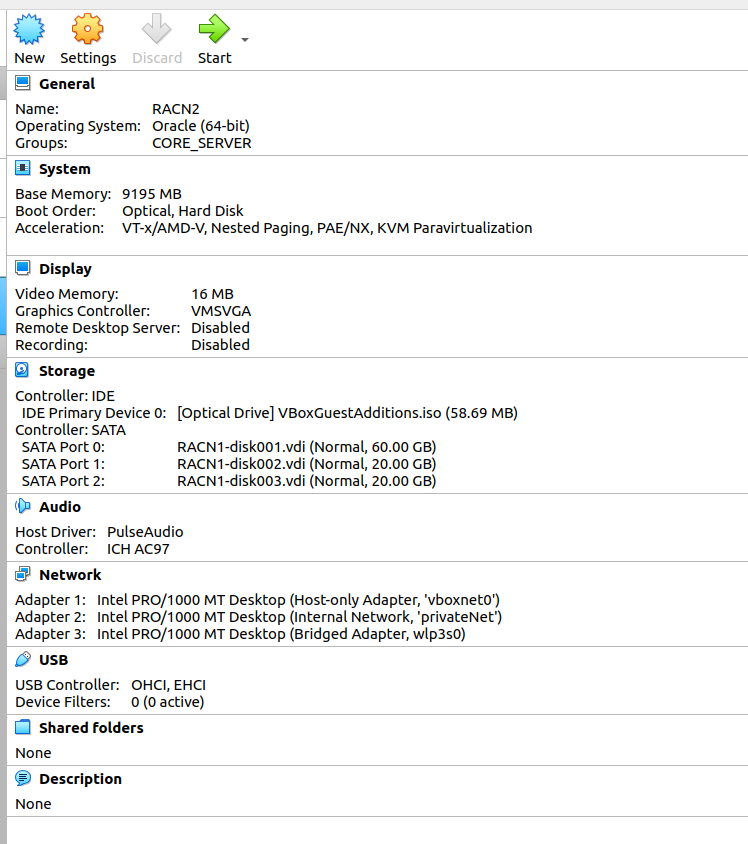
Rename Machine as RACN2 => Click IMPORT
Verify Imported Data as below from VBox
Step 5=> Shared Disks creation
In this step we will create Shared Disks , which will be used for RAC Diskgroups. Click => FIle => Virtual Media Manager => CreateClick => VDI=>Next
Click => Fixed Size =>Next
Provide path for disks and Size as 30GB => Create
Perform same operation for FRA for 20GB & OCR for 30 GB
Now we will convert above created 3 Disks to shared modes. Click => DATA.vdi => Type =>Shareable => Apply
Click => FRA.vdi => Type =>Shareable => Apply
Click => OCR.vdi => Type =>Shareable => Apply =>Exit
Now we will add above created disks to RACN1. Click VBOX => Settings => Controler:SATA => Add harddisks Select above create 3 disks and add them as we did above .
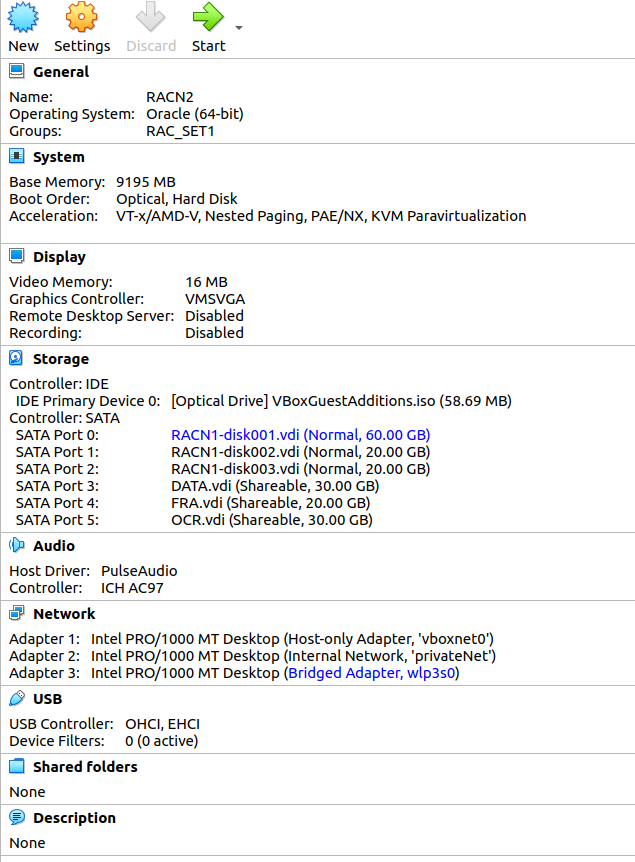
Final output as below.
Perform same Disk addidtion on RACN2 node as well
Step 6=> Node specific actions
We are going to perform some Node specific operations which are required for RAC setup. Make Sure Both VBox Machine is running now. A=> Hostfile setup. we will use below host file .Edit /etc/hosts as ROOT user on both nodes.B=> Login n RACN2 Vbox machine ONLY and change hostname as below from ROOT user> [root@racnoden1 ~]# nmcli general hostname racnoden1.ace2oracle.lab [root@racnoden1 ~]# nmcli general hostname racnoden2.ace2oracle.lab [root@racnoden1 ~]# nmcli general hostname racnoden2.ace2oracle.lab [root@racnoden1 ~]# service systemd-hostnamed restart Redirecting to /bin/systemctl restart systemd-hostnamed.service [root@racnoden1 ~]# hostname racnoden2.ace2oracle.lab C=> Perform Network Operation on RACN2 VBox Machine Only. Click on Network Manager on TOP Right corner of VBOX. We will get below configuration details
Click Etherne(enp0s3) => Configure => IPv4 Settings and provide details as below.=> Apply
Click Etherne(enp0s8) => Configure => IPv4 Settings and provide details as below.=> Apply
Click Etherne(enp0s9) => Configure => IPv4 Settings and leave defaults as below.=> Apply
Restart network and verify details as below. [root@racnoden2 ~]#systemctl restart network
D=> Rpm installations Execute below commands on Both Nodes as ROOT user. Ensure to have proper internet connection. #yum update -y #yum install -y oracle-database-preinstall-19c.x86_64 #yum install oracleasm-support #sysctl -p E=>Group & User creation and modification. Execute below commands on BOTH nodes from ROOT user.| Group addition [root@racnoden1 ~]# groupadd -g 54327 asmdba [root@racnoden1 ~]# groupadd -g 54328 asmoper [root@racnoden1 ~]# groupadd -g 54329 asmadmin User Modification [root@racnoden1 ~]# usermod -G dba,oper,backupdba,dgdba,kmdba,asmdba,asmoper,asmadmin,racdba oracle [root@racnoden1 ~]# usermod -g oinstall oracle User Addition [root@racnoden1 ~]# [root@racnoden1 ~]# useradd -u 54321 -g oinstall -G dba,oper,backupdba,dgdba,kmdba,asmdba,asmoper,asmadmin,racdba grid Verification [root@racnoden1 ~]# id -a grid uid=54321(grid) gid=54321(oinstall) groups=54321(oinstall),54322(dba),54323(oper),54324(backupdba), 54325(dgdba),54326(kmdba),54330(racdba),54327(asmdba),54328(asmoper),54329(asmadmin) [root@racnoden1 ~]# id -a oracle uid=1000(oracle) gid=54321(oinstall) groups=54321(oinstall),54322(dba),54323(oper),54324(backupdba), 54325(dgdba),54326(kmdba),54330(racdba),54327(asmdba),54328(asmoper),54329(asmadmin) [root@racnoden1 ~]# F=> Change password of oracle & grid user from ROOT on BOTH nodes [root@racnoden1 ~]#passwd oracle [root@racnoden1 ~]#passwd grid G=> Create directory for Software setup on BOTH nodes. From grid user [grid@racnoden1 ~]$ mkdir -p /grid_home/app/oracle [grid@racnoden1 ~]$ mkdir -p /grid_home/app/19c/grid [grid@racnoden1 ~]$ From oracle user [oracle@racnoden1 ora_home]$ mkdir -p /ora_home/app/oracle [oracle@racnoden1 ora_home]$ mkdir -p /ora_home/app/19c/db H=>Stop and disable Firewall from ROOT user on Both nodes. [root@racnoden1 ~]# systemctl stop firewalld.service [root@racnoden1 ~]# systemctl disable firewalld.service Removed symlink /etc/systemd/system/dbus-org.fedoraproject.FirewallD1.service. Removed symlink /etc/systemd/system/basic.target.wants/firewalld.service. [root@racnoden1 ~]# [root@racnoden1 ~]# systemctl status firewalld.service I=> Configure .bach_profile for oracle & grid user as below on BOTH nodes. Change ORACLE_SID as per node. for grid [grid@racnoden1 ~]$ cat ~/.bash_profile # .bash_profile # Get the aliases and functions if [ -f ~/.bashrc ]; then . ~/.bashrc fi # User specific environment and startup programs PATH=$PATH:$HOME/.local/bin:$HOME/bin export PATH export TMP=/tmp export TMPDIR=$TMP export ORACLE_BASE=/grid_home/app/oracle export ORACLE_HOME=/grid_home/app/19c/grid export ORACLE_SID=+ASM1 export BASE_PATH=/usr/sbin:$PATH export PATH=$ORACLE_HOME/bin:$BASE_PATH export LD_LIBRARY_PATH=$ORACLE_HOME/lib:/lib:/usr/lib export CLASSPATH=$ORACLE_HOME/JRE:$ORACLE_HOME/jlib:$ORACLE_HOME/rdbms/jlib [grid@racnoden1 ~]$ for Oracle [oracle@racnoden1 ~]$ cat ~/.bash_profile # .bash_profile # Get the aliases and functions if [ -f ~/.bashrc ]; then . ~/.bashrc fi # User specific environment and startup programs PATH=$PATH:$HOME/.local/bin:$HOME/bin export PATH # User specific environment and startup programs PATH=$PATH:$HOME/.local/bin:$HOME/bin export PATH export TMP=/tmp export TMPDIR=$TMP export ORACLE_BASE=/ora_home/app/oracle export ORACLE_HOME=/ora_home/app/19c/db export ORACLE_SID=DBSET1 export BASE_PATH=/usr/sbin:$PATH export PATH=$ORACLE_HOME/bin:$BASE_PATH export LD_LIBRARY_PATH=$ORACLE_HOME/lib:/lib:/usr/lib export CLASSPATH=$ORACLE_HOME/JRE:$ORACLE_HOME/jlib:$ORACLE_HOME/rdbms/jlib [oracle@racnoden1 ~]$ J=>Stop and disable avahi-Deamon on Both nodes as ROOT user. Execute below commands [root@racnoden2 ~]# systemctl stop avahi-daemon Warning: Stopping avahi-daemon.service, but it can still be activated by: avahi-daemon.socket [root@racnoden2 ~]# systemctl disable avahi-daemon Removed symlink /etc/systemd/system/multi-user.target.wants/avahi-daemon.service. Removed symlink /etc/systemd/system/sockets.target.wants/avahi-daemon.socket. Removed symlink /etc/systemd/system/dbus-org.freedesktop.Avahi.service. [root@racnoden2 ~]# systemctl status avahi-daemon ensure "YES" as below [root@racnoden2 ~]# cat /etc/sysconfig/network # Created by anaconda # oracle-database-preinstall-19c : Add NOZEROCONF=yes NOZEROCONF=yes [root@racnoden2 ~]# logout K=> Check NTP status. As we have already configured NTP Client on BOTH hosts.Please see above assumptions. to cnfigure NTP on Both Nodes click NTP_SETUP Verify if ntp sync wokring . [root@racnoden1 ~]# systemctl enable chronyd.service [root@racnoden1 ~]# systemctl restart chronyd.service [root@racnoden1 ~]# chronyc -a 'burst 4/4' [root@racnoden1 ~]# chronyc -a makestep [root@racnoden1 ~]# ntpstat synchronised to NTP server (192.168.56.201) at stratum 4 time correct to within 1419 ms polling server every 64 s [root@racnoden2 ~]# ntpstat synchronised to NTP server (192.168.56.201) at stratum 4 time correct to within 1085 ms polling server every 64 s [root@racnoden2 ~]# L=> Check and Configure DNS As we have already configured DNS Client on BOTH hosts.Please see above assumptions. to cnfigure NTP on Both Nodes click DNS_SETUP Verify if DNS wokring . [root@racnoden1 ~]# nslookup racnode-scan Server: 192.168.56.200 Address: 192.168.56.200#53 Name: racnode-scan.ace2oracle.lab Address: 192.168.56.107 Name: racnode-scan.ace2oracle.lab Address: 192.168.56.105 Name: racnode-scan.ace2oracle.lab Address: 192.168.56.106 M=>Add open file values for "grid" user on Both nodes as Root user. Edit below file and append conent for grid user . [root@racnoden2 ~]# vi /etc/security/limits.d/oracle-database-preinstall-19c.conf grid soft nofile 1024 grid hard nofile 65536 grid soft nproc 16384 grid hard nproc 16384 grid soft stack 10240 grid hard stack 32768 grid hard memlock 134217728 grid soft memlock 134217728 grid soft data unlimited grid hard data unlimited N=> Copy Binary file on RACN1 node and unzip the same from grid user, Check File [root@racnoden1 ~]# cd /media/sf_Binary/ [root@racnoden1 sf_Binary]# ls -lrt total 15028456 -rwxrwx---. 1 root vboxsf 2889184573 May 3 2021 LINUX.X64_193000_grid_home.zip -rwxrwx---. 1 root vboxsf 3059705302 May 3 2021 LINUX.X64_193000_db_home.zip Copy file [root@racnoden1 sf_Binary]# cp *.zip /ora_home/ [root@racnoden1 ~]# cd /ora_home/ [root@racnoden1 ora_home]# ls -lrt total 5815168 drwx------. 2 root root 16384 Jun 10 17:15 lost+found -rwxr-x---. 1 root root 3059705302 Jun 10 23:58 LINUX.X64_193000_db_home.zip -rwxr-x---. 1 root root 2889184573 Jun 10 23:58 LINUX.X64_193000_grid_home.zip [root@racnoden1 ora_home]# Change permission [root@racnoden1 ora_home]# chown oracle:oinstall * [root@racnoden1 ora_home]# ls -lrt total 5815168 drwx------. 2 oracle oinstall 16384 Jun 10 17:15 lost+found -rwxr-x---. 1 oracle oinstall 3059705302 Jun 10 23:58 LINUX.X64_193000_db_home.zip -rwxr-x---. 1 oracle oinstall 2889184573 Jun 10 23:58 LINUX.X64_193000_grid_home.zip Unzip from grid user in $ORACLE_HOME for cluster [grid@racnoden1 ~]$ cd /ora_home/ [grid@racnoden1 ora_home]$ unzip LINUX.X64_193000_grid_home.zip -d /grid_home/app/19c/grid/ Archive: LINUX.X64_193000_grid_home.zip ... ... O=> Install cvu rpm on BOTH node using ROOT. Copy rpm on /tmp folder [grid@racnoden1 ora_home]$ cd /grid_home/app/19c/grid/cv/rpm/ [grid@racnoden1 rpm]$ cp cvuqdisk-1.0.10-1.rpm /tmp/ SCP rpm to second node on /tmp folder [grid@racnoden1 rpm]$ scp cvuqdisk-1.0.10-1.rpm racnoden2:/tmp/ grid@racnoden2's password: cvuqdisk-1.0.10-1.rpm 100% 11KB 13.6MB/s 00:00 [grid@racnoden1 rpm]$ Install rpm on NODE1 from ROOT user [root@racnoden1 ~]# cd /tmp/ [root@racnoden1 tmp]# rpm -Uvh cvuqdisk-1.0.10-1.rpm Preparing... #################### [100%] Using default group oinstall to install package Updating / installing... 1:cvuqdisk-1.0.10-1 ################## [100%] [root@racnoden1 tmp]# [root@racnoden1 tmp]# logout Install rpm on NODE2 from ROOT user [root@racnoden2 ~]# cd /tmp/ [root@racnoden2 tmp]# rpm -Uvh cvuqdisk-1.0.10-1.rpm Preparing... #################### [100%] Using default group oinstall to install package Updating / installing... 1:cvuqdisk-1.0.10-1 ################### [100%]
Step 7=> Configure ASM on Both Nodes as ROOT.
=> Execute below commands as ROOT user on RACN1

[root@racnoden1 ~]# /usr/sbin/oracleasm configure -i
Configuring the Oracle ASM library driver.

This will configure the on-boot properties of the Oracle ASM library
driver.  The following questions will determine whether the driver is
loaded on boot and what permissions it will have.  The current values
will be shown in brackets ('[]').  Hitting  without typing an
answer will keep that current value.  Ctrl-C will abort.

Default user to own the driver interface []: grid
Default group to own the driver interface []: oinstall
Start Oracle ASM library driver on boot (y/n) [n]: y
Scan for Oracle ASM disks on boot (y/n) [y]: y
Writing Oracle ASM library driver configuration: done
[root@racnoden1 ~]#
[root@racnoden1 ~]#
[root@racnoden1 ~]#  /usr/sbin/oracleasm configure
ORACLEASM_ENABLED=true
ORACLEASM_UID=grid
ORACLEASM_GID=oinstall
ORACLEASM_SCANBOOT=true
ORACLEASM_SCANORDER=""
ORACLEASM_SCANEXCLUDE=""
ORACLEASM_SCAN_DIRECTORIES=""
ORACLEASM_USE_LOGICAL_BLOCK_SIZE="false"
[root@racnoden1 ~]# /usr/sbin/oracleasm init
Creating /dev/oracleasm mount point: /dev/oracleasm
Loading module "oracleasm": oracleasm
Configuring "oracleasm" to use device physical block size
Mounting ASMlib driver filesystem: /dev/oracleasm

[root@racnoden1 ~]#  df -ha | grep oracle
oracleasmfs        0     0     0    - /dev/oracleasm
[root@racnoden1 ~]#

=> Execute below commands as ROOT user on RACN2

[root@racnoden2 ~]# /usr/sbin/oracleasm configure -i
Configuring the Oracle ASM library driver.

This will configure the on-boot properties of the Oracle ASM library
driver.  The following questions will determine whether the driver is
loaded on boot and what permissions it will have.  The current values
will be shown in brackets ('[]').  Hitting  without typing an
answer will keep that current value.  Ctrl-C will abort.

Default user to own the driver interface []: grid
Default group to own the driver interface []: oinstall
Start Oracle ASM library driver on boot (y/n) [n]: y
Scan for Oracle ASM disks on boot (y/n) [y]: y
Writing Oracle ASM library driver configuration: done

[root@racnoden2 ~]# /usr/sbin/oracleasm configure
ORACLEASM_ENABLED=true
ORACLEASM_UID=grid
ORACLEASM_GID=oinstall
ORACLEASM_SCANBOOT=true
ORACLEASM_SCANORDER=""
ORACLEASM_SCANEXCLUDE=""
ORACLEASM_SCAN_DIRECTORIES=""
ORACLEASM_USE_LOGICAL_BLOCK_SIZE="false"
[root@racnoden2 ~]# /usr/sbin/oracleasm init
Creating /dev/oracleasm mount point: /dev/oracleasm
Loading module "oracleasm": oracleasm
Configuring "oracleasm" to use device physical block size
Mounting ASMlib driver filesystem: /dev/oracleasm
[root@racnoden2 ~]# df -ha | grep oracle
/dev/sr0         59M   59M     0 100% /run/media/oracle/VBox_GAs_6.1.34
oracleasmfs        0     0     0    - /dev/oracleasm
[root@racnoden2 ~]#

=> Configure ASM Disks RACN1.

[root@racnoden1 ~]# oracleasm createdisk DATA /dev/sdd1
Writing disk header: done
Instantiating disk: done

[root@racnoden1 ~]# oracleasm createdisk FRA /dev/sde1
Writing disk header: done
Instantiating disk: done

[root@racnoden1 ~]# oracleasm createdisk OCR /dev/sdf1
Writing disk header: done
Instantiating disk: done

[root@racnoden1 ~]# oracleasm scandisks
Reloading disk partitions: done
Cleaning any stale ASM disks...
Scanning system for ASM disks...
[root@racnoden1 ~]# oracleasm listdisks
DATA
FRA
OCR
[root@racnoden1 ~]#

=> Scan  ASM Disks on RACN2 as ROOT.
[root@racnoden2 ~]#
[root@racnoden2 ~]# oracleasm scandisks
Reloading disk partitions: done
Cleaning any stale ASM disks...
Scanning system for ASM disks...
Instantiating disk "DATA"
Instantiating disk "OCR"
Instantiating disk "FRA"
[root@racnoden2 ~]# oracleasm listdisks
DATA
FRA
OCR
Step 8=>Configure SSH for password less connectivity and Exeute runcluvfy
=> Configure Passwordless for "grid" user

Login as "grid" user on RACN1 and execute below commands.
[grid@racnoden1 ~]$ cd $ORACLE_HOME/deinstall
[grid@racnoden1 ~]$./sshUserSetup.sh -user grid -hosts "racnoden1 racnoden2" -noPromptPassphrase -confirm -advanced

=> Execute runcluvfy to check any error before cluster setup.

[grid@racnoden1 ~]$ cd $ORACLE_HOME/
[grid@racnoden1 ~]$./runcluvfy.sh stage -pre crsinst -n racnoden1,racnoden2 -verbose
Step 9=> Cluster Setup
Login to "grid" user and start setup as below. [grid@racnoden1 ~]$ cd $ORACLE_HOME/ [grid@racnoden1 ~]$ ./gridSetup.sh Click => Configure Grid Infra for New Cluster => NextClick => Configure an Oracle Standalone Cluster => Next
Provide Cluster Name , SCAN NAME , SCAN PORT Details and Click Next
Click => Add
Provide RACN2 Public Hostname & Virtual Hostname details => Ok
Click => SSH connectivity
Click OS Username and provide password => test
Click => Ok
Select enp0s3 for Public and enp0s8 for ASM & Private => Click Next
Click => Use Oracle Flex ASM => Next
Click => No => Next
Fill Disk Group Name as OCR Redundancy External Click => Change discovery Path => /dev/oracleasm/disks/* and Click OKAY Select OCR disk & CLick => Next
Provide password for all account & Click Next
Click => Do Not use => Next
Click => Next
Provide Group details as below & Click => Next
Provide Oracle Base and click => Next
Provide Inventory location and Click => Next
Click => Next
Wait for prerequisite to complete
Click => Ignore all & Click => Next
Click Yes
Save response file and Click => Install
Now we need to execute orainstRoot.sh one-by-one on both nodes. then proceed to execute root.sh one-by-one on both nodes.
orainstRoot.sh executions [root@racnoden1 ~]# /grid_home/app/oraInventory/orainstRoot.sh Changing permissions of /grid_home/app/oraInventory. Adding read,write permissions for group. Removing read,write,execute permissions for world. Changing groupname of /grid_home/app/oraInventory to oinstall. The execution of the script is complete. [root@racnoden2 ~]# /grid_home/app/oraInventory/orainstRoot.sh Changing permissions of /grid_home/app/oraInventory. Adding read,write permissions for group. Removing read,write,execute permissions for world. Changing groupname of /grid_home/app/oraInventory to oinstall. The execution of the script is complete. root.sh Executions on Node by Node [root@racnoden1 ~]# /grid_home/app/19c/grid/root.sh Performing root user operation. The following environment variables are set as: ORACLE_OWNER= grid ORACLE_HOME= /grid_home/app/19c/grid Enter the full pathname of the local bin directory: [/usr/local/bin]: Copying dbhome to /usr/local/bin ... Copying oraenv to /usr/local/bin ... Copying coraenv to /usr/local/bin ... Creating /etc/oratab file... Entries will be added to the /etc/oratab file as needed by Database Configuration Assistant when a database is created Finished running generic part of root script. Now product-specific root actions will be performed. Relinking oracle with rac_on option Using configuration parameter file: /grid_home/app/19c/grid/crs/install/crsconfig_params The log of current session can be found at: /grid_home/app/oracle/crsdata/racnoden1/crsconfig/rootcrs_racnoden1_2022-06-11_01-32-24AM.log 2022/06/11 01:32:34 CLSRSC-594: Executing installation step 1 of 19: 'SetupTFA'. 2022/06/11 01:32:34 CLSRSC-594: Executing installation step 2 of 19: 'ValidateEnv'. 2022/06/11 01:32:34 CLSRSC-363: User ignored prerequisites during installation 2022/06/11 01:32:34 CLSRSC-594: Executing installation step 3 of 19: 'CheckFirstNode'. 2022/06/11 01:32:36 CLSRSC-594: Executing installation step 4 of 19: 'GenSiteGUIDs'. 2022/06/11 01:32:37 CLSRSC-594: Executing installation step 5 of 19: 'SetupOSD'. 2022/06/11 01:32:37 CLSRSC-594: Executing installation step 6 of 19: 'CheckCRSConfig'. 2022/06/11 01:32:38 CLSRSC-594: Executing installation step 7 of 19: 'SetupLocalGPNP'. 2022/06/11 01:33:19 CLSRSC-4002: Successfully installed Oracle Trace File Analyzer (TFA) Collector. 2022/06/11 01:33:20 CLSRSC-594: Executing installation step 8 of 19: 'CreateRootCert'. 2022/06/11 01:33:25 CLSRSC-594: Executing installation step 9 of 19: 'ConfigOLR'. 2022/06/11 01:33:38 CLSRSC-594: Executing installation step 10 of 19: 'ConfigCHMOS'. 2022/06/11 01:33:38 CLSRSC-594: Executing installation step 11 of 19: 'CreateOHASD'. 2022/06/11 01:33:44 CLSRSC-594: Executing installation step 12 of 19: 'ConfigOHASD'. 2022/06/11 01:33:44 CLSRSC-330: Adding Clusterware entries to file 'oracle-ohasd.service' 2022/06/11 01:34:34 CLSRSC-594: Executing installation step 13 of 19: 'InstallAFD'. 2022/06/11 01:34:40 CLSRSC-594: Executing installation step 14 of 19: 'InstallACFS'. 2022/06/11 01:35:29 CLSRSC-594: Executing installation step 15 of 19: 'InstallKA'. 2022/06/11 01:35:35 CLSRSC-594: Executing installation step 16 of 19: 'InitConfig'. ASM has been created and started successfully. [DBT-30001] Disk groups created successfully. Check /grid_home/app/oracle/cfgtoollogs/asmca/asmca-220611AM013611.log for details. 2022/06/11 01:37:21 CLSRSC-482: Running command: '/grid_home/app/19c/grid/bin/ocrconfig -upgrade grid oinstall' CRS-4256: Updating the profile Successful addition of voting disk a12d032526de4fa2bf51d148560cbb3c. Successfully replaced voting disk group with +OCR. CRS-4256: Updating the profile CRS-4266: Voting file(s) successfully replaced ## STATE File Universal Id File Name Disk group -- ----- ----------------- --------- --------- 1. ONLINE a12d032526de4fa2bf51d148560cbb3c (/dev/oracleasm/disks/OCR) [OCR] Located 1 voting disk(s). 2022/06/11 01:38:51 CLSRSC-594: Executing installation step 17 of 19: 'StartCluster'. 2022/06/11 01:40:28 CLSRSC-343: Successfully started Oracle Clusterware stack 2022/06/11 01:40:28 CLSRSC-594: Executing installation step 18 of 19: 'ConfigNode'. 2022/06/11 01:42:05 CLSRSC-594: Executing installation step 19 of 19: 'PostConfig'. 2022/06/11 01:42:32 CLSRSC-325: Configure Oracle Grid Infrastructure for a Cluster ... succeeded [root@racnoden1 ~]# [root@racnoden2 ~]# /grid_home/app/19c/grid/root.sh Performing root user operation. The following environment variables are set as: ORACLE_OWNER= grid ORACLE_HOME= /grid_home/app/19c/grid Enter the full pathname of the local bin directory: [/usr/local/bin]: Copying dbhome to /usr/local/bin ... Copying oraenv to /usr/local/bin ... Copying coraenv to /usr/local/bin ... Creating /etc/oratab file... Entries will be added to the /etc/oratab file as needed by Database Configuration Assistant when a database is created Finished running generic part of root script. Now product-specific root actions will be performed. Relinking oracle with rac_on option Using configuration parameter file: /grid_home/app/19c/grid/crs/install/crsconfig_params The log of current session can be found at: /grid_home/app/oracle/crsdata/racnoden2/crsconfig/rootcrs_racnoden2_2022-06-11_01-43-33AM.log 2022/06/11 01:43:38 CLSRSC-594: Executing installation step 1 of 19: 'SetupTFA'. 2022/06/11 01:43:38 CLSRSC-594: Executing installation step 2 of 19: 'ValidateEnv'. 2022/06/11 01:43:38 CLSRSC-363: User ignored prerequisites during installation 2022/06/11 01:43:38 CLSRSC-594: Executing installation step 3 of 19: 'CheckFirstNode'. 2022/06/11 01:43:40 CLSRSC-594: Executing installation step 4 of 19: 'GenSiteGUIDs'. 2022/06/11 01:43:40 CLSRSC-594: Executing installation step 5 of 19: 'SetupOSD'. 2022/06/11 01:43:40 CLSRSC-594: Executing installation step 6 of 19: 'CheckCRSConfig'. 2022/06/11 01:43:42 CLSRSC-594: Executing installation step 7 of 19: 'SetupLocalGPNP'. 2022/06/11 01:43:44 CLSRSC-594: Executing installation step 8 of 19: 'CreateRootCert'. 2022/06/11 01:43:44 CLSRSC-594: Executing installation step 9 of 19: 'ConfigOLR'. 2022/06/11 01:43:55 CLSRSC-594: Executing installation step 10 of 19: 'ConfigCHMOS'. 2022/06/11 01:43:55 CLSRSC-594: Executing installation step 11 of 19: 'CreateOHASD'. 2022/06/11 01:43:56 CLSRSC-594: Executing installation step 12 of 19: 'ConfigOHASD'. 2022/06/11 01:43:56 CLSRSC-330: Adding Clusterware entries to file 'oracle-ohasd.service' 2022/06/11 01:44:07 CLSRSC-4002: Successfully installed Oracle Trace File Analyzer (TFA) Collector. 2022/06/11 01:44:41 CLSRSC-594: Executing installation step 13 of 19: 'InstallAFD'. 2022/06/11 01:44:42 CLSRSC-594: Executing installation step 14 of 19: 'InstallACFS'. 2022/06/11 01:45:36 CLSRSC-594: Executing installation step 15 of 19: 'InstallKA'. 2022/06/11 01:45:37 CLSRSC-594: Executing installation step 16 of 19: 'InitConfig'. 2022/06/11 01:45:45 CLSRSC-594: Executing installation step 17 of 19: 'StartCluster'. 2022/06/11 01:46:38 CLSRSC-343: Successfully started Oracle Clusterware stack 2022/06/11 01:46:38 CLSRSC-594: Executing installation step 18 of 19: 'ConfigNode'. 2022/06/11 01:46:57 CLSRSC-594: Executing installation step 19 of 19: 'PostConfig'. 2022/06/11 01:47:03 CLSRSC-325: Configure Oracle Grid Infrastructure for a Cluster ... succeeded [root@racnoden2 ~]# [root@racnoden2 ~]# Click => Okay and wait for installation to complete
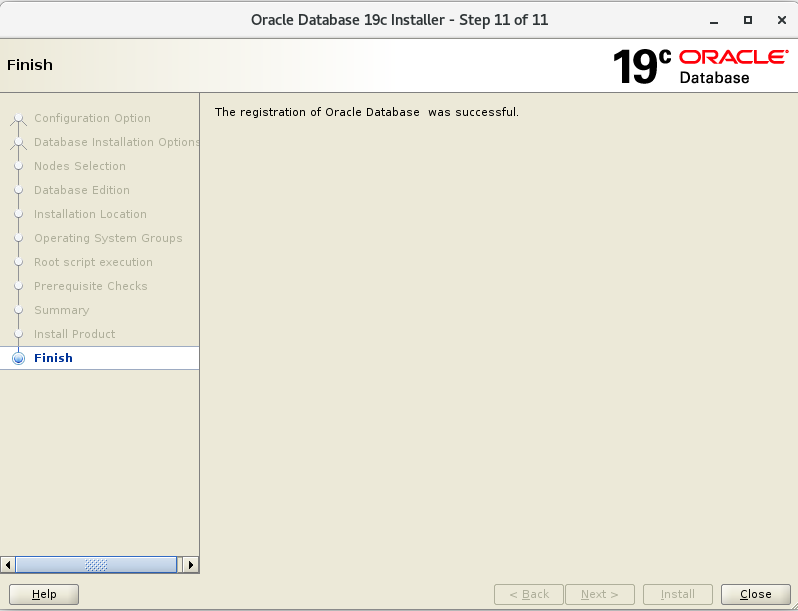
Click => Close and setup complete
Verify Setup as below [root@racnoden1 ~]# ps -eaf |grep pmon root 25166 10959 0 01:50 pts/0 00:00:00 grep --color=auto pmon grid 27458 1 0 01:39 ? 00:00:00 asm_pmon_+ASM1 [root@racnoden1 ~]# [root@racnoden2 ~]# /grid_home/app/19c/grid/bin/crsctl stat res -t -------------------------------------------------------------------------------- Name Target State Server State details -------------------------------------------------------------------------------- Local Resources -------------------------------------------------------------------------------- ora.LISTENER.lsnr ONLINE ONLINE racnoden1 STABLE ONLINE ONLINE racnoden2 STABLE ora.chad ONLINE ONLINE racnoden1 STABLE ONLINE ONLINE racnoden2 STABLE ora.net1.network ONLINE ONLINE racnoden1 STABLE ONLINE ONLINE racnoden2 STABLE ora.ons ONLINE ONLINE racnoden1 STABLE ONLINE ONLINE racnoden2 STABLE ora.proxy_advm OFFLINE OFFLINE racnoden1 STABLE OFFLINE OFFLINE racnoden2 STABLE -------------------------------------------------------------------------------- Cluster Resources -------------------------------------------------------------------------------- ora.ASMNET1LSNR_ASM.lsnr(ora.asmgroup) 1 ONLINE ONLINE racnoden1 STABLE 2 ONLINE ONLINE racnoden2 STABLE 3 OFFLINE OFFLINE STABLE ora.LISTENER_SCAN1.lsnr 1 ONLINE ONLINE racnoden2 STABLE ora.LISTENER_SCAN2.lsnr 1 ONLINE ONLINE racnoden1 STABLE ora.LISTENER_SCAN3.lsnr 1 ONLINE ONLINE racnoden1 STABLE ora.OCR.dg(ora.asmgroup) 1 ONLINE ONLINE racnoden1 STABLE 2 ONLINE ONLINE racnoden2 STABLE 3 OFFLINE OFFLINE STABLE ora.asm(ora.asmgroup) 1 ONLINE ONLINE racnoden1 Started,STABLE 2 ONLINE ONLINE racnoden2 Started,STABLE 3 OFFLINE OFFLINE STABLE ora.asmnet1.asmnetwork(ora.asmgroup) 1 ONLINE ONLINE racnoden1 STABLE 2 ONLINE ONLINE racnoden2 STABLE 3 OFFLINE OFFLINE STABLE ora.cvu 1 ONLINE ONLINE racnoden1 STABLE ora.qosmserver 1 ONLINE ONLINE racnoden1 STABLE ora.racnoden1.vip 1 ONLINE ONLINE racnoden1 STABLE ora.racnoden2.vip 1 ONLINE ONLINE racnoden2 STABLE ora.scan1.vip 1 ONLINE ONLINE racnoden2 STABLE ora.scan2.vip 1 ONLINE ONLINE racnoden1 STABLE ora.scan3.vip 1 ONLINE ONLINE racnoden1 STABLE -------------------------------------------------------------------------------- [root@racnoden2 ~]# ps -eaf |grep pmon root 13722 630 0 01:50 pts/1 00:00:00 grep --color=auto pmon grid 31489 1 0 01:47 ? 00:00:00 asm_pmon_+ASM2 [root@racnoden2 ~]#
Step 10 => oracle passwordless Setup & Install Oracle Binary
We need to configure passwordless for oracle user as below [oracle@racnoden1 ora_home]$ cd $ORACLE_HOME/deinstall [oracle@racnoden1 deinstall]$ ./sshUserSetup.sh -user oracle -hosts "racnoden1 racnoden2" -noPromptPassphrase -confirm -advanced Install as below [oracle@racnoden1 ora_home]$ echo $ORACLE_HOME /ora_home/app/19c/db [oracle@racnoden1 ora_home]$ ls -lrt total 5815172 drwx------. 2 oracle oinstall 16384 Jun 10 17:15 lost+found -rwxr-x---. 1 oracle oinstall 3059705302 Jun 10 23:58 LINUX.X64_193000_db_home.zip -rwxr-x---. 1 oracle oinstall 2889184573 Jun 10 23:58 LINUX.X64_193000_grid_home.zip drwxr-xr-x. 4 oracle oinstall 4096 Jun 11 20:03 app [oracle@racnoden1 ora_home]$ [oracle@racnoden1 ora_home]$ [oracle@racnoden1 ora_home]$ unzip LINUX.X64_193000_db_home.zip -d $ORACLE_HOME Archive: LINUX.X64_193000_db_home.zip creating: /ora_home/app/19c/db/drdaas/ [oracle@racnoden1 ora_home]$ cd $ORACLE_HOME [oracle@racnoden1 ora_home]$ ./runInstaller Click => Set Up Software only => NextClick => Oracle Real Application Cluster Database => Next
Click => ssh connectivity => provide OS Username => Password => test
Click => Next
Click => Enterprise Edition => Next
Provide Oracle base details and Click => Next
Provide group details as below & Click => Next
Click => Next
Wait for Prerequisite to complete
Click => Install and wait.
Execute root.sh node-by-node and click okay [root@racnoden1 ~]# /ora_home/app/19c/db/root.sh Performing root user operation. The following environment variables are set as: ORACLE_OWNER= oracle ORACLE_HOME= /ora_home/app/19c/db Enter the full pathname of the local bin directory: [/usr/local/bin]: The contents of "dbhome" have not changed. No need to overwrite. The contents of "oraenv" have not changed. No need to overwrite. The contents of "coraenv" have not changed. No need to overwrite. Entries will be added to the /etc/oratab file as needed by Database Configuration Assistant when a database is created Finished running generic part of root script. Now product-specific root actions will be performed. [root@racnoden1 ~]# [root@racnoden1 ~]# [root@racnoden1 ~]# ======================= [root@racnoden2 ~]# /ora_home/app/19c/db/root.sh Performing root user operation. The following environment variables are set as: ORACLE_OWNER= oracle ORACLE_HOME= /ora_home/app/19c/db Enter the full pathname of the local bin directory: [/usr/local/bin]: The contents of "dbhome" have not changed. No need to overwrite. The contents of "oraenv" have not changed. No need to overwrite. The contents of "coraenv" have not changed. No need to overwrite. Entries will be added to the /etc/oratab file as needed by Database Configuration Assistant when a database is created Finished running generic part of root script. Now product-specific root actions will be performed. [root@racnoden2 ~]# Setup completed now
Step 11=> ASM Diskgroup Creation
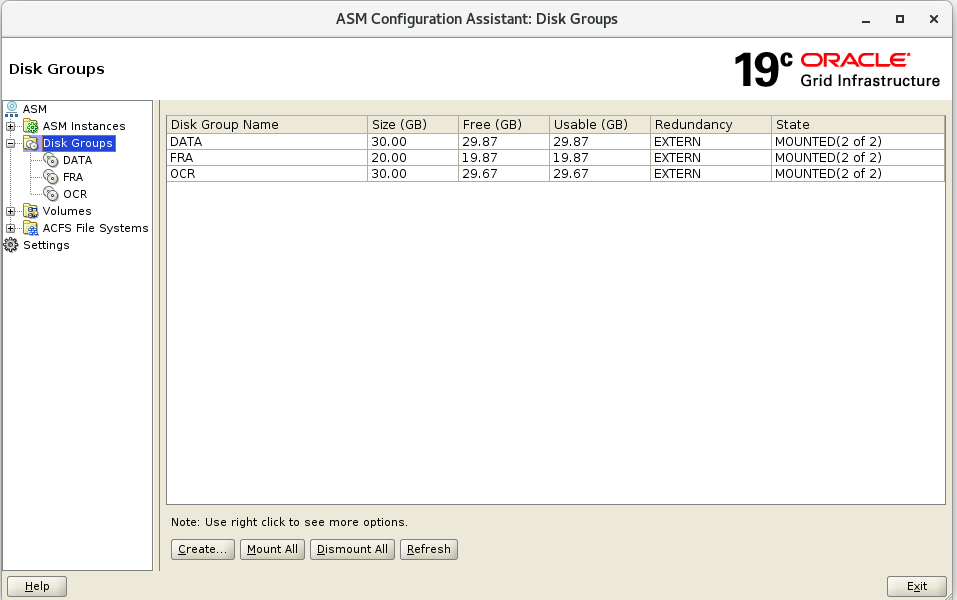
in this step we will create ASM Diskgroup which will be DATA & FRA Login as "grid" user and execute "asmca" Click => Disk GroupsClick => Create
Set Diskgroup Name => DATA Redundancy => External Select DATA Disks as below and then Click OKAY
Wait for completion
Perform same operation for FRA disk and final output will be as below Click EXIT
Step 12 => Install Oracle Database
We will be creating Database using DBCA command as below
Login as "oracle" user
[oracle@racnoden1 ora_home]$ cd $ORACLE_HOME [oracle@racnoden1 ora_home]$ dbca Click => Create a database => NextClick => Advanced Configuration => Next
Set details as below and click => Next
Select Both Nodex => Next
Set DB Global Name and SID and Click => Next
Set below details and Click => Next
Specify FRA and Enable archiving => Next
Click => Next
Click Next
Click => Next
Provide password for user and click Next
Click => Create Database => Click Next
Wait for completion
Click => Finish
Wait for completion
DB is created now => Click Close
Verify database as below [oracle@racnoden1 ora_home]$ sqlplus "/as sysdba" SQL*Plus: Release 19.0.0.0.0 - Production on Sat Jun 11 21:06:03 2022 Version 19.3.0.0.0 Copyright (c) 1982, 2019, Oracle. All rights reserved. Connected to: Oracle Database 19c Enterprise Edition Release 19.0.0.0.0 - Production Version 19.3.0.0.0 SQL> SQL> SQL> select name,open_mode,database_role from gv$database; NAME OPEN_MODE DATABASE_ROLE --------- -------------------- ---------------- DBSET READ WRITE PRIMARY DBSET READ WRITE PRIMARY SQL> Database is created now and RAC system ready
© 2021 Ace2Oracle. All Rights Reserved | Developed By IBOX444